
While studying for the Identity and Access Management certification, I wanted to dive deeper into Embedded Logins. Here are my notes on this – they may not cover what you need, so please do use Salesforce’s official documentation to supplement any research you are doing.
Embedded Login
Before getting to the login widget, I needed to explore embedded logins. Salesforce Identity Embedded Login enables the integration of an external website with Salesforce’s login capabilities. Embedded Login can be used to:
- Enable single sign-on alternatives
- Act as an added layer of authentication for actions taken on the website
- Collect additional information from or about the user using the Embedded Login.
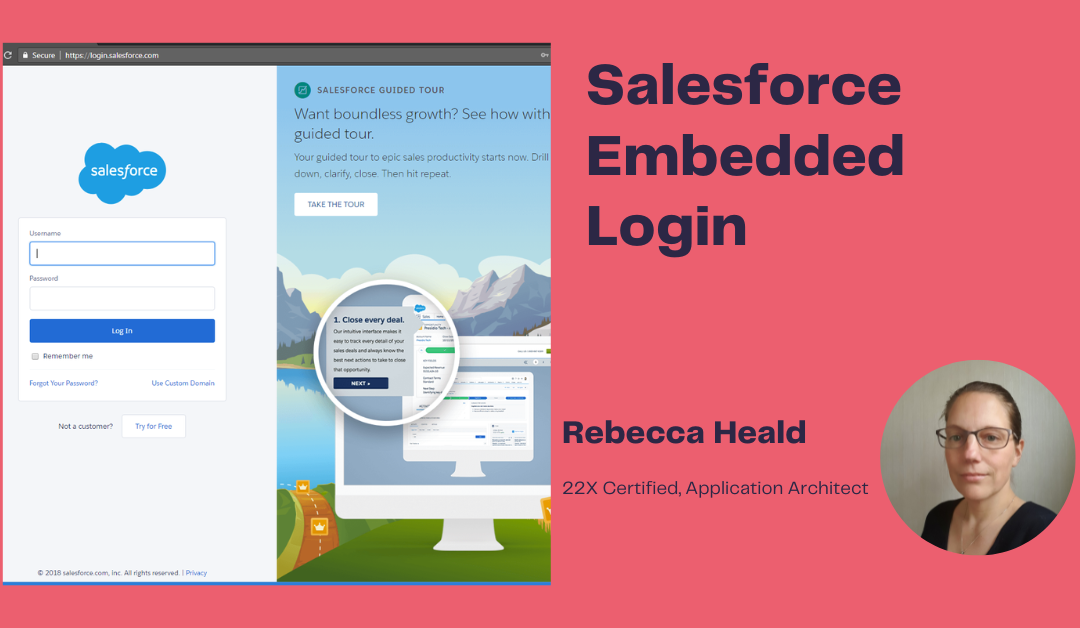
Embedded login can be added as a modal or popup (both require a login button to see the login form) or an inline form. On login, there is an onLogin function that can be configured – to show the user’s name or something similar. When logging out there is an onLogout function which can return the embedded login to its original state (such as displaying the login button again.)
Embedded login can also be located in the App Launcher within Salesforce as a transparent Single Sign-On option.
What happens with Embedded Login?
- User clicks the login button
- User enters credentials
- Salesforce authenticates user
- Salesforce checks the connected app for the scope of permissions that will be granted with the access token
- Salesforce sends the access token, permissions, and custom attributes to the callback URL
- Callback URL pulls the user’s information from Salesforce and caches it locally and uses the access token, permission, and attributes to determine what the user can access
- onLogin function (if configured) displays information to the user
- Connected app maintains the connection between the web page and Salesforce, if required, now that the authentication and authorisation is completed.
Setting Up Embedded Login
Setting up Embedded Login requires the website developer and a Salesforce admin to work together. First of all the Salesforce admin sets up all the elements of an Embedded Login on the Salesforce side (Authentication Providers, Experience Cloud Site, Login page, add the website domain to the Cross Origin Resource Sharing allowlist and create the connected app). Then the web developer can add the meta tags for the Embedded Login to the web page, supply the onlogin and onlogout specifications as needed and add the connected apps callback URL to handle the authorisation response.
The Connected App is essential. It controls the ongoing communication between the website and Salesforce after authorisation. A callback URL is used to receive the access token and, if requested, user information passed from Salesforce. As soon as all of this occurs, the connected app maintains the connection as long as the session is active.
If a user forgets their password, or self-registration has been set up, this is all handled with the Experience Cloud Site that is set up.
Steps to set up Embedded Login:
- In the settings of your Experience Cloud Site:
- Select Apply Login Page Type to Embedded Login
- Select Block Redirect to Unknown URL

- Save.
Note: Block Redirects to Unknown URL ensures that only redirects that are of the same host or domain as the site or is allow-listed in the Embedded Login Salesforce-allowed-domains meta tag are allowed.
- Next, enable Cross Origin Resource Sharing (CORS) by navigating to Security → CORS in Setup and click New. Enter the domain where the Embedded Login is deployed.

- Create the connected app for the Embedded Login.
- Enable OAuth Settings
- Add the Callback URL (to start you will have to enter a placeholder and update later in the setup process)
- Select the Scope: Access unique user identifiers (openid) and any others that you need.
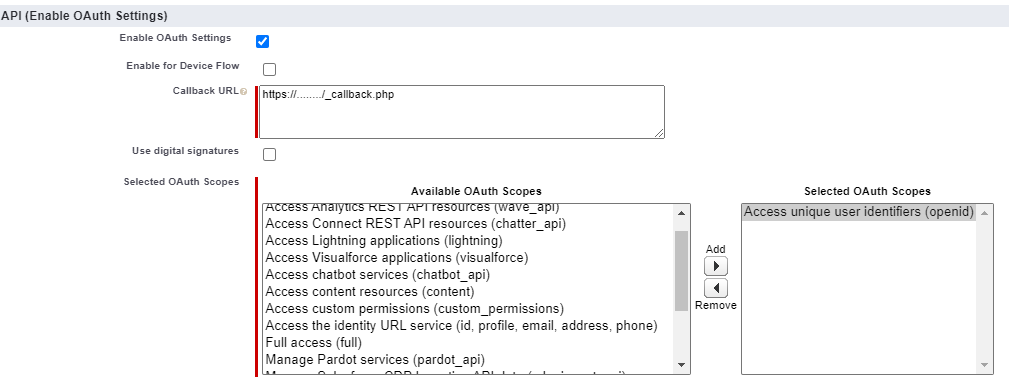
- Save your app and then copy the consumer key that is created. This will be used for the meta tag salesforce_client_id
- Next Edit Policies (click Manage then click Edit Policies)
- Select Admin approved users are pre-authorized for Permitted Users and save
- In the connected app, scroll down to Profiles. Click Manage Profiles to select profiles that can access the connected app. As we are using an Experience Cloud site – a user with Experience Cloud access is key. Then save.
- If custom attributes are to be part of the Embedded Login, go to the Custom Attribute related list and click New.
- Create your custom attributes:

- The web developer then needs to add the Embedded Login Meta tags in the HTML <HEAD> element of the web page. These values need to be added:
- salesforce-community
This is the Salesforce Experience site URL that is hosting the identity services. - salesforce-client-id
This is the connected app’s consumer secret. - salesforce-redirect-uri
The URL of the callback that has been added to the connected app. - salesforce-mode
This determines whether to display the login form inline, as a modal or as a popup. - salesforce-target
The visible HTML element identifier, such as a button or link, which executes a JavaScript function when clicked. - salesforce-login-handler
JavaScript function to call on a successful login event. - salesforce-logout-handler
JavaScript function to call on a successful logout event. - salesforce-server-callback (required if you’re using a server-side callback)
This boolean meta tag is defaulted to false. It Indicates whether the Embedded Login callback is on the server. If it will be a server-side callback this must be set to true.
- salesforce-community
- Optional meta tags can be added. Find the optional tags here.
- Add the Embedded Login’s CSS resources. There is a default style sheet that comes with Embedded Login – this can be customised.
- Add the Embedded Login script:
<script src=”https://embeddedlogin-MYSITEINFORMATION/demo/servlet/servlet.loginwidgetcontroller?type=javascript_widget” async defer></script>.
This script can be customised for options see this article here. - If required write onLogin and onLogout functions. These are Javascript functions and more can be found out about customising those here.
- If a callback to Salesforce is required, create a web page named _callback on the same domain as the embedded login is held. Add the following meta tags in the HTML’s <HEAD> element:
- salesforce-community
This is the Salesforce Experience site URL that is hosting the identity services. - salesforce-allowed-domains
This is only used with callbacks. The callback must be located on the same domain as the Embedded Login web page. - salesforce-mode (any value entered here must end in -callback)
This can be set to modal-callback, inline-callback or popup-callback. It must match the web pages mode. - (Optional) salesforce-save-access-token with the value set to “true”.
This will save the access token and the user can continue to interact with Salesforce during the current active session. - (Optional) salesforce-logout-on-browser-close
This is a boolean meta tag defaulted to true. This deletes the user’s Embedded Login session after the browser window is closed.
- salesforce-community
- Finally nothing should be in the HTML <BODY> tags.
The final meta tags will look something similar to the below.
<html>
<head>
<meta name=”salesforce-community” content=”…Community Login URL…“>
<meta name=”salesforce-client-id” content=”….Consumer Key from Connected App….“>
<meta name=”salesforce-mode” content=”inline-callback”>
<meta name=”salesforce-save-access-token” content=”false”>
<meta name=”salesforce-allowed-domains” content=”… the Embedded Login Web Page on your website…..“>
<meta name=”salesforce-redirect-uri” content=”….. The callback webpage created…..“>
<meta name=”salesforce-target” content=”#salesforce-login”>
<meta name=”salesforce-login-handler” content=”onLogin”>
<meta name=”salesforce-logout-handler” content=”onLogout”>
<script src=”https://embeddedlogin-MYSITEINFORMATION/demo/servlet/
servlet.loginwidgetcontroller?type=javascript_widget” async defer></script>
</head>
<body></body>
</html>
- If the Embedded Login is to be available from the App Launcher, configure the Start URL. How to configure a Start URL is here.

Final Note:
Typically Embedded Login uses the REST API and it needs to be secured with SSL.